Mission LogI've been sick all week and unable to handle the thinking man's game that is Classic BattleTech until tonight (i.e., last night), but we're back with another exciting entry!
Day 6 Notes (Dec. 26)A Capellan munitions convoy and its escorts come dangerously close to crossing our path today.
Drake holds the Bastards back, though: we may get a second crack at those supplies when we attack the depot tomorrow, and it's probably best to keep our powder dry with that operation so close.
We're now potentially facing combat on a roll of 8+.
Supply Depot Attack (Dec. 27)The Bastards march through the night to arrive at the supply depot at the break of dawn. We are increasingly a unit of crack shots, so the slightly suboptimal lighting plays to our advantage.

We arrive on the field from the southwest, deployed in three lances. The medium mechs form an ad-hoc lance to the east, and will use their speed to get into the base and start demolishing. (The larger buildings in the center of the base look a little more warehouse-like, to our pilots' eyes, and are also more fragile than the larger buildings to the northwest side of the base.)
The faster heavy mechs, plus
Pepper's Archer, deploy to the west, where they will first engage the command bunker nestled into the southwest side of the hill, then join the heaviest mechs in the center of the field, to defeat the defending lance. Which is, I might add, a bit of a doozy.
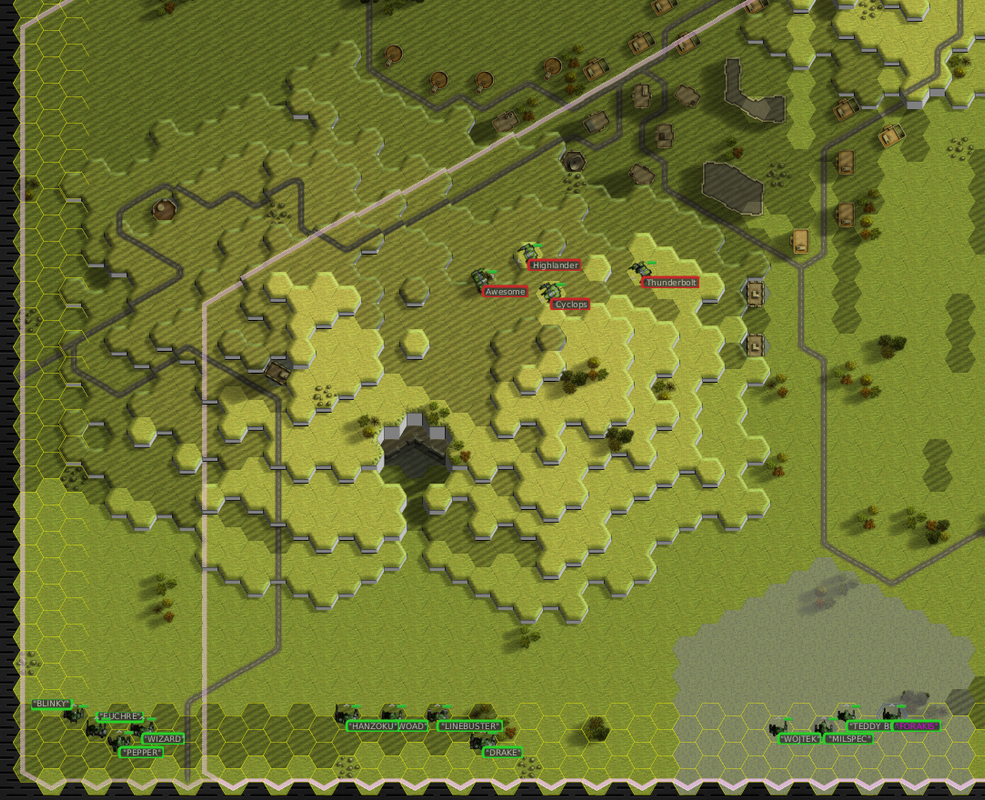
More assault mechs than we have on the field, although not more assault mechs than we have period, counting the ones currently in transit from Tsingtao to its jump point.
Turn 1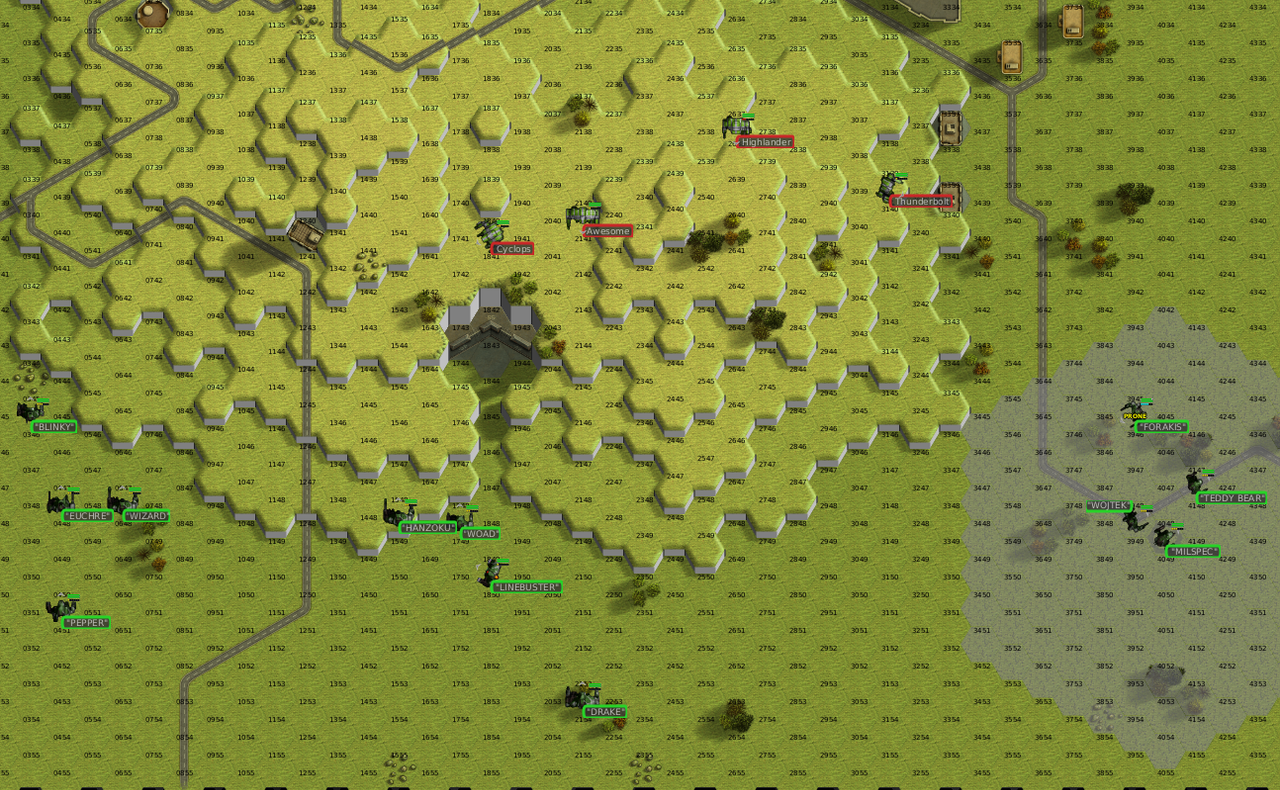
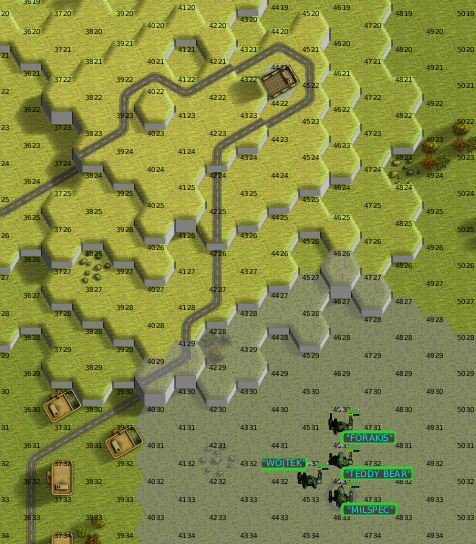
We are not off to the most flying of starts; Forakis skids on the paved road occupied by the light lance, trips, and skids through a stand of trees. The Capellan scratch that, the Fifteenth Dracon Thunderbolt heads that way, no doubt hoping to put some fire into the downed mech. Demolition may have to wait a few turns.
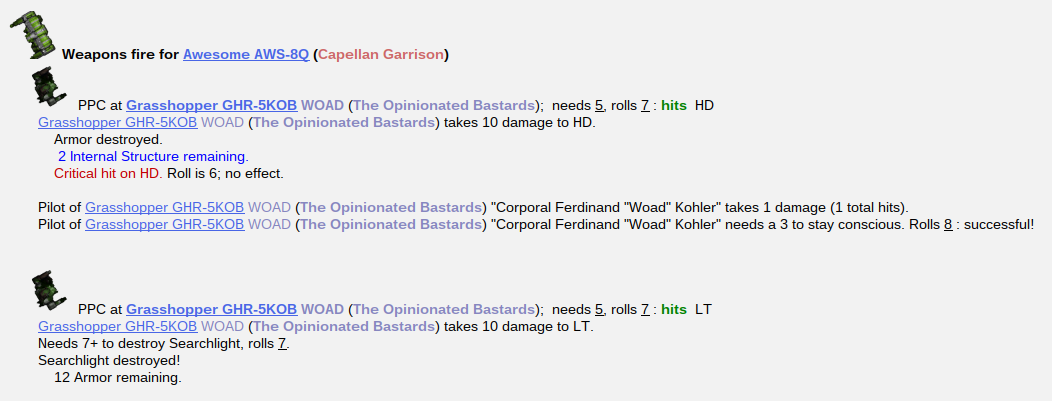
Pepper brings down the building with an LRM volley, after the rest of the mechs pour maximum firepower into it, freeing our eastern lance to join the central fray. The enemy Awesome takes hits from a number of our mechs, amounting to almost 60 damage.
Turn 2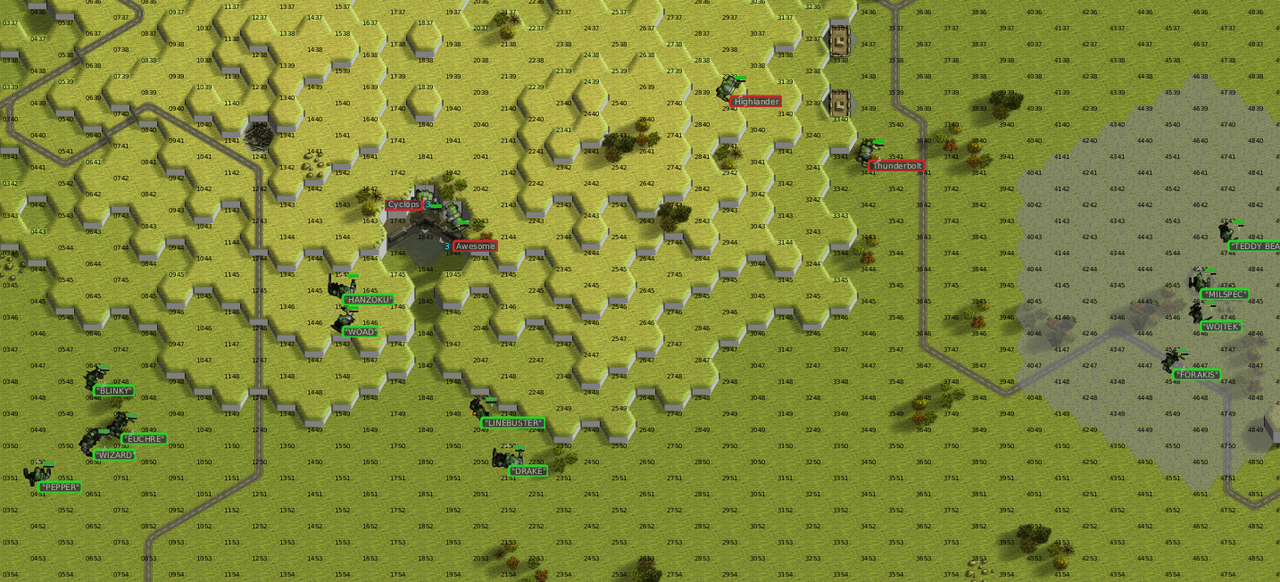
Forakis gets her Phoenix Hawk on its feet and makes a run for it, making herself a hard target. The Fifteenth Dracon Highlander and Thunderbolt continue to come after our medium mechs. Neither is fast enough to catch them, as long as they keep on the run, but in the ideal case we'd separate the Thunderbolt from the Highlander and take it down from short range.
The other Fifteenth Dracon mechs drop into a little valley on the south side of the hill. On closer inspection, there are hangar doors at the valley's end. More supplies? A cache of some kind? It wasn't visible on the satellite map, but that's not surprisingit's nearly invisible from overhead, given the way the valley walls rise above it. The enemy is fighting awfully hard for this position. Might be worth checking out,
Drake thinks to himself...
The Cyclops is in an awkward position: not really in cover, and exposed to the guns of two full lances of mechs.
Woad scores the kill with a hit to the enemy mech's ammunition, going by the gun cameras, but really, it's a team effort. (
Woad's Grasshopper is the mech-sized version of an LB10X autocannon, at close rangehe has a lot of chances for critical hits.)
As he and the other medium mechs keep running northward,
Milspec hears some pings from his sensors. With its ECM and active probe, his Crab is one of our most capable EW mechs, and the extended range sensors suggest there are Capellan reinforcements on the way at top speed. We'll have limited time to finish any objectives we want to finish here.
Turn 3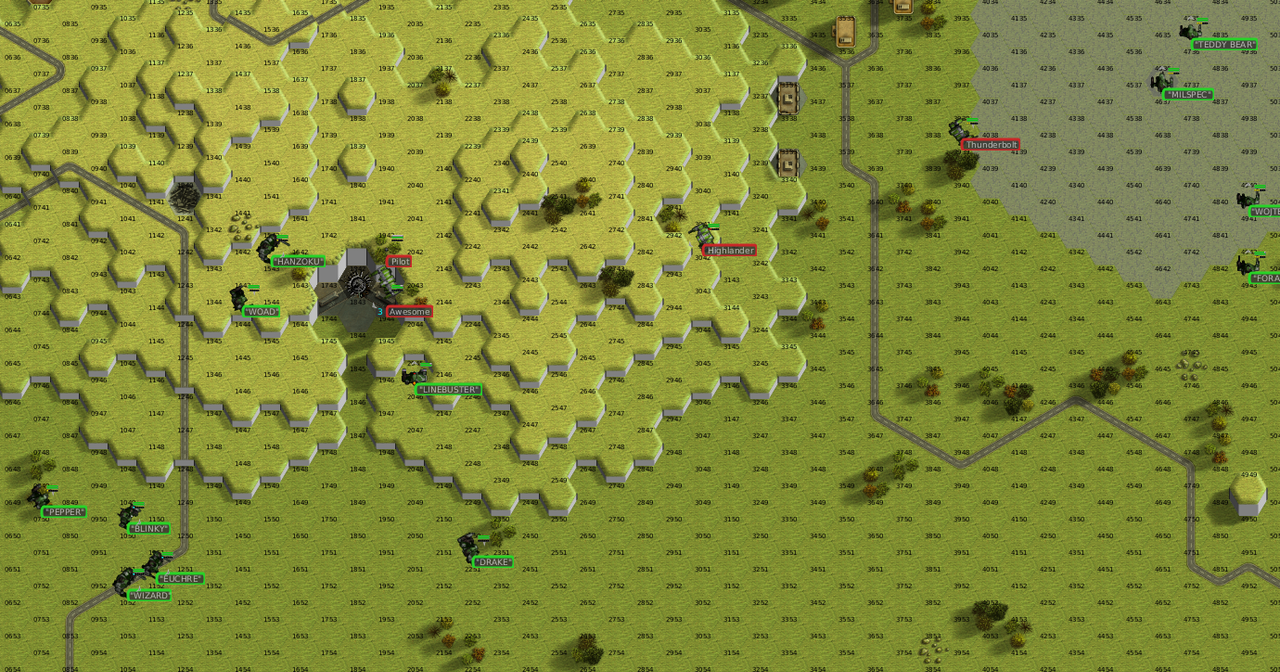
The mediums have successfully separated the Thunderbolt from the Highlander. This seems like the time to tackle it.
The Fifteenth Dracon's Awesome pilot stares his likely destruction in the face with stoic acceptance, and remains stationary atop the massive, armored doors as the Bastards circle for the kill.
After his luck last round,
Woad very nearly gets unlucky here.
 Drake
Drake orders him to fall back. No sense in pushing his luck. The Dracon Awesome is battered, but still stands undaunted atop the hangar door. One more turn should finish him, although it feels almost dishonorable. Oh wellthey don't call us Bastards because we fight fair.
Turn 4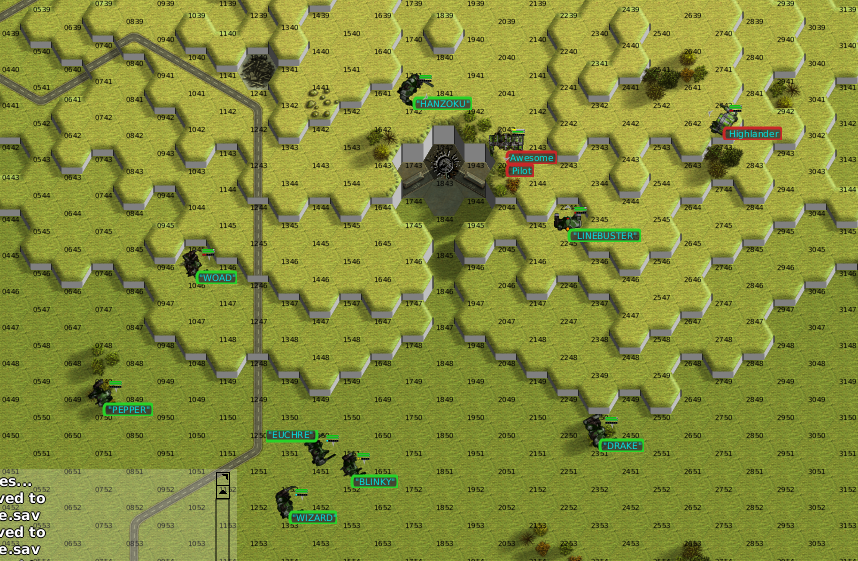
The medium mechs get into very favorable positions on the enemy Thunderbolt, which we can hopefully convert into a quick kill.
Milspec keeps an eye on his sensor readout. Ther's still time before the reinforcements hit the field.
Pepper's timing is impeccable: he chooses just the right moment to add a large laser into the mix, which sends heat alarms blaring in his Archer's cockpit, but proves to be the final hit needed to bring the Awesome down, carving into its center torso and severing critical power connections. Simultaneously,
Woadfiring on a jumping retreatslices off its left arm.
Drake, getting to work on the Fifteenth Dracon Highlander, connects with a pair of PPC shots to its left side that send it off balance, crashing to the dirt. Elsewhere on the field,
Teddy Bear hits with his machine guns and all four of his medium lasers, and puts two hits on the Thunderbolt's head to boot. It's damaged pretty badly, but still on its feet for the moment.
Drake's curiosity gets the better of him. "Woad, Hanzoku, Blinky," he calls over the radio, "crack those doors open."
Turn 5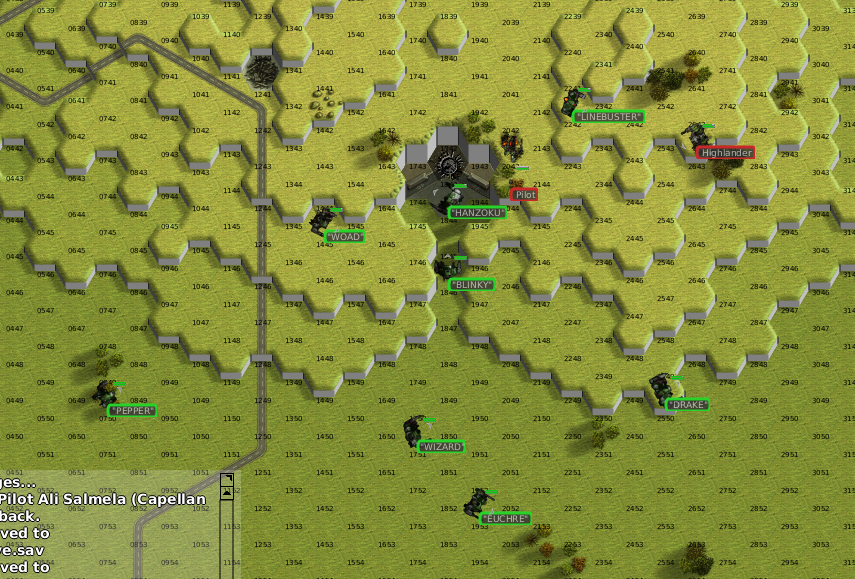

The Thunderbolt finds itself badly flanked once again, and takes a speculative shot at
Drake rather than attempting to free itself of the harrassing mediums.
Woad, retreat now countermanded as threats evaporate, moves back toward his new target, while
Hanzoku and
Blinky get to work. This is a heavily-armored door. It's going to take a minute.
Teddy once more proves his mettle in the Vulcan: one of his medium laser shots connects with the Thunderbolt's head
again, and this time it's sufficient to slice through the cockpit. Even if he hadn't done the job,
Forakis would have sealed the deal with a hit to the Thunderbolt's SRM ammunition.
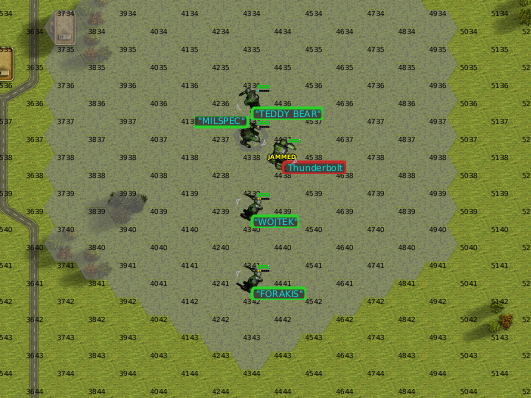
Teddy (ranking officer in this medium lance) queries
Milspec on the status of the inbound Capellan reinforcements. There is sufficient time, it seems: he orders best speed for the northern bunker, and radios
Drake to suggest that the heavier lances get started on the warehouses.
Drake okays this act of initiative, and turns his attention back to disassembling the Highlander.
Turn 6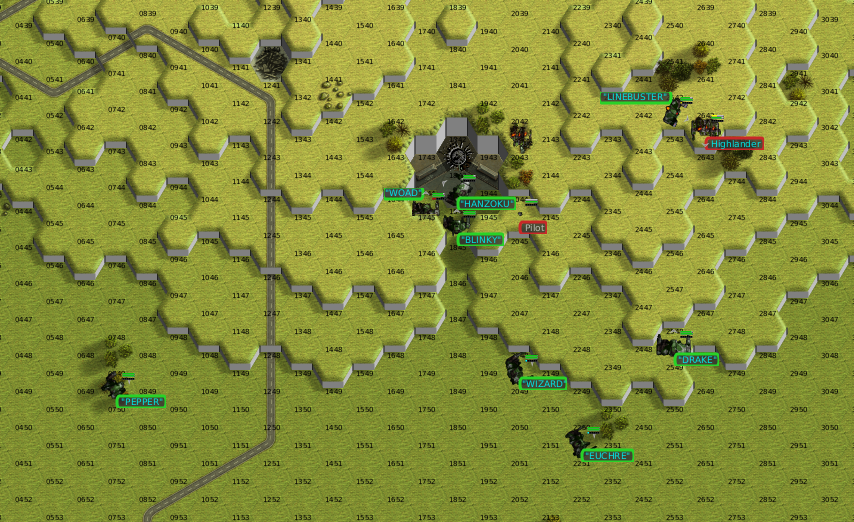
 Linebuster
 gets right up in the Highlander's face and toggles his autocannons to cluster shot. He's looking for the kill if nobody else scores it.
The medium lance races up the field, as the mechs with older targeting systems begin to pick up sensor returns on the Capellan reinforcements, too.
Cluster ammo once again proves its worth: the Highlander slows to a stop, teeters, and collapses as explosive pellets find their way into its interior. It shows telltale signs of cooking off, and
Linebuster backpedals hastily as it goes up in a fireball.
Hanzoku puts the finishing touches on a roughly mech-sized hole in the armored hangar doors, and before
Drake can say anything, he has already pushes his Guillotine in through the wreckage. Slightly exasperated: "Woad, cover his exit. Blinky, get up here and help us with these warehouses."
Turn 7The medium lance finishes the northern bunker from short range, and
Teddy orders an about-face to rejoin the rest of the company in destroying the main base.
Linebuster has already started, having climbed the hill to a better firing position.
Drake attempts to get a report out of
Hanzoku, who starts by making various astonished noises, and then says, "I will need a minute. Do not enter. This is delicate." Then, his comm goes offline, and his mech's power signature vanishes from our scopes.
It's enough to give a commander gray hair!
Turn 8
This is a grand old time, the Bastards find, pelting defenseless buildings with heavy firepower and gleefully watching them collapse in a smattering of secondary explosions.
Linebuster puts a few cluster shots into the dish of the communications tower near the center of the depot, collapsing it through the roof of the building below.
Woad reports, "I see lights inside. Hanzoku? Do you copy?"
Drake waits for an answer, then shakes his head. "He asked for a minute. I guess we'll give him a minute."
Turn 9The Bastards continue to wreak havoc upon this poor defenseless base. An alarm goes off in
Milspec's cockpit. The Capellan reinforcements are here.
Turn 10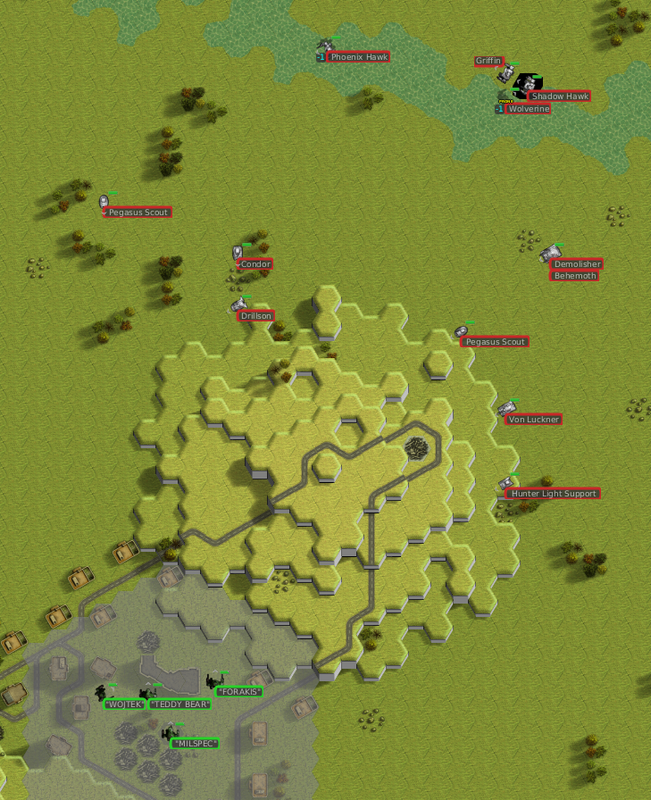
A full company of mechs and vehicles is on the way. This is probably not a fight we should take,
Drake reflects, given how relatively undamaged we are now and how much work we'll probably have to do over the next few days. He gives the order to finish off the warehouse and fall back to the hill. Whatever Hanzoku's up to, hopefully he's done soon.
Woad reports, "I have a power signature. It's... not a Guillotine?"
There is a crackle of static, and then
Hanzoku's voice. "It
is me. I am nearly ready..."
Turn 11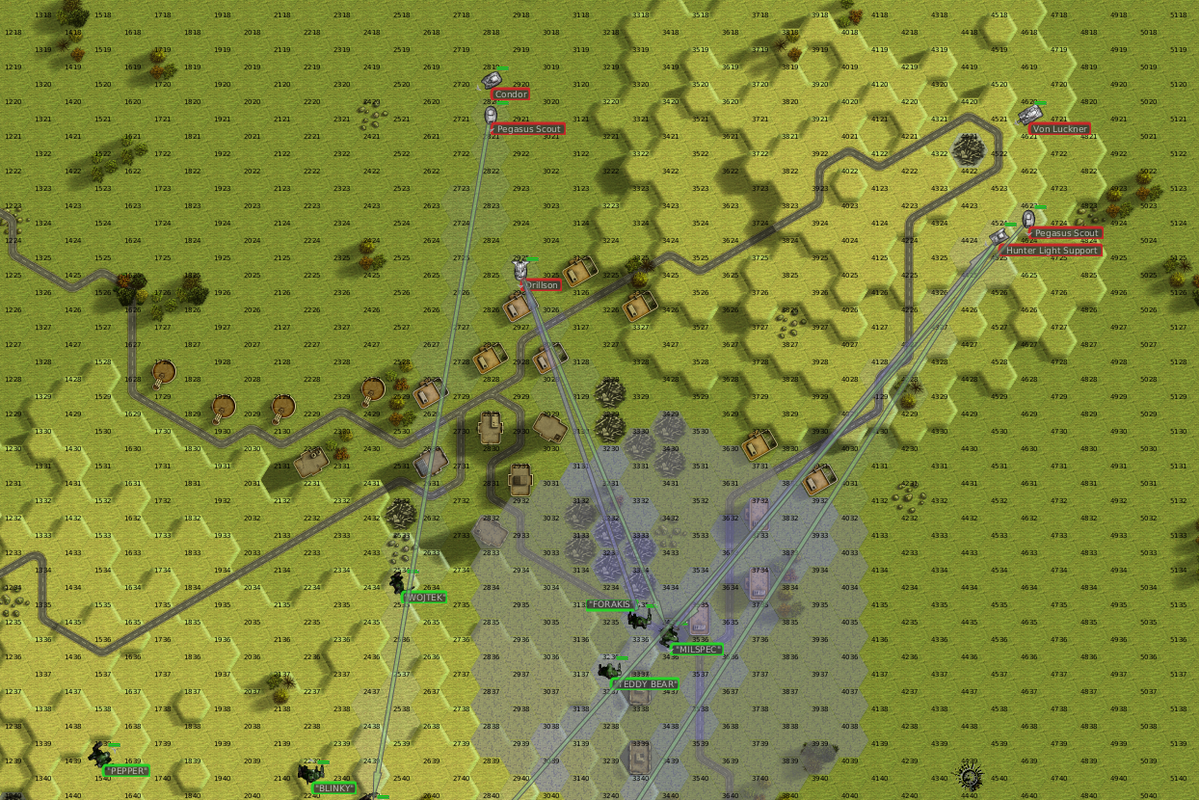
The Capellans have a lot of hover units, which move
fast on open ground like this. They're already almost among us.
Drake calls over the radio, "Fall back. Return fire when able, prioritize getting off of the field. By my count, that's your minute, Hanzoku."
Laser fire illuminates the edges of the hole over which
Woad keeps watch, widening it slightly in all directions.
Turn 12
The enemy hover tanks are closing in.
The mech that emerges from the destroyed hangar doors is not
Hanzoku's Guillotine. It's a modestly larger design, with a large laser and small laser in each arm, an autocannon barrel protruding from the right torso, and twelve SRM tubes on the left.
"Is that a Crockett?"
Woad wonders.
"Yes," Hanzoku replies. "Evacuate the hill. I do not know how much will cave in when the Guillotine's reactor goes off."
Before
Drake can really process that last sentence, weapons fire flies back and forth across the battlefield.
Linebuster takes a few light hits, but immobilizes the Drillson tank closining in on usa good hit, given that it's one of the dangerous SRM variants.
Turn 13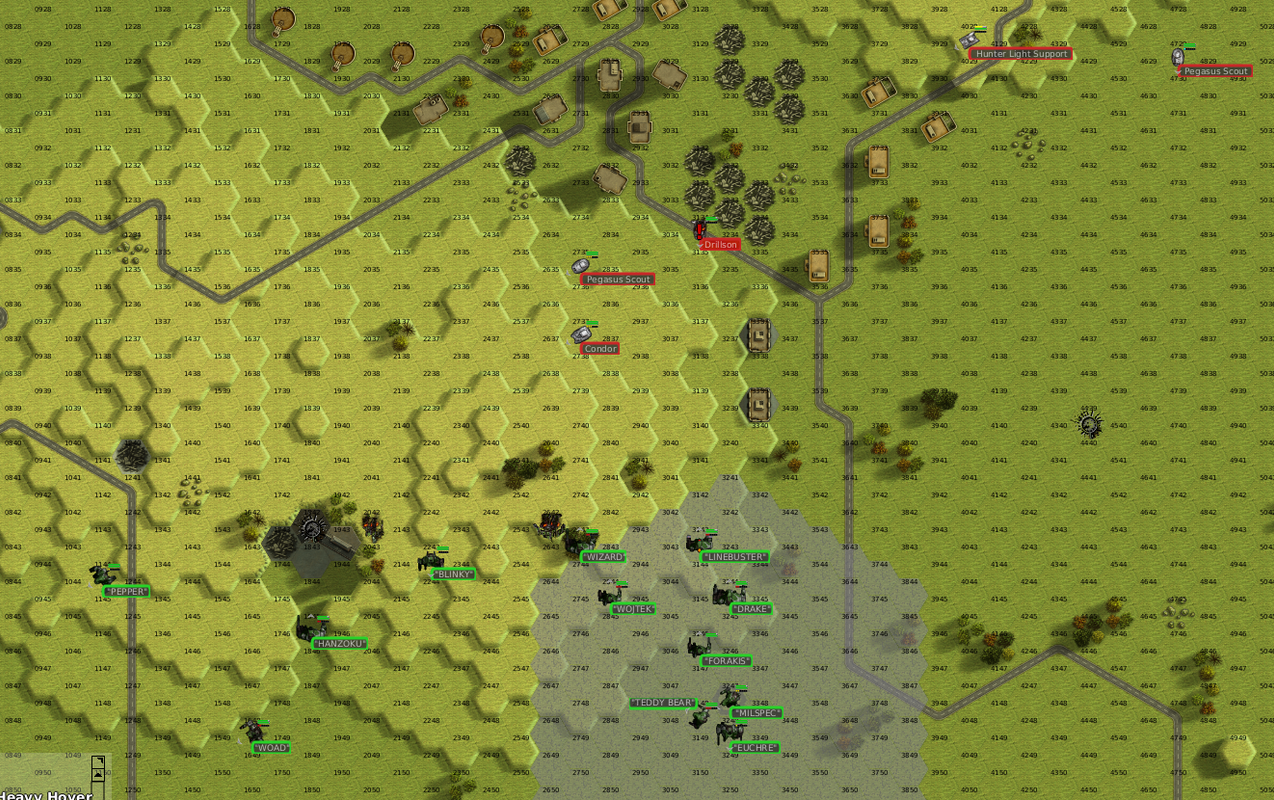 Drake
Drake doesn't need to repeat that order. Every mechwarrior on the hill who has jump jets lights them, and all who don't book it at maximum speed away from the valley cache.
Turn 14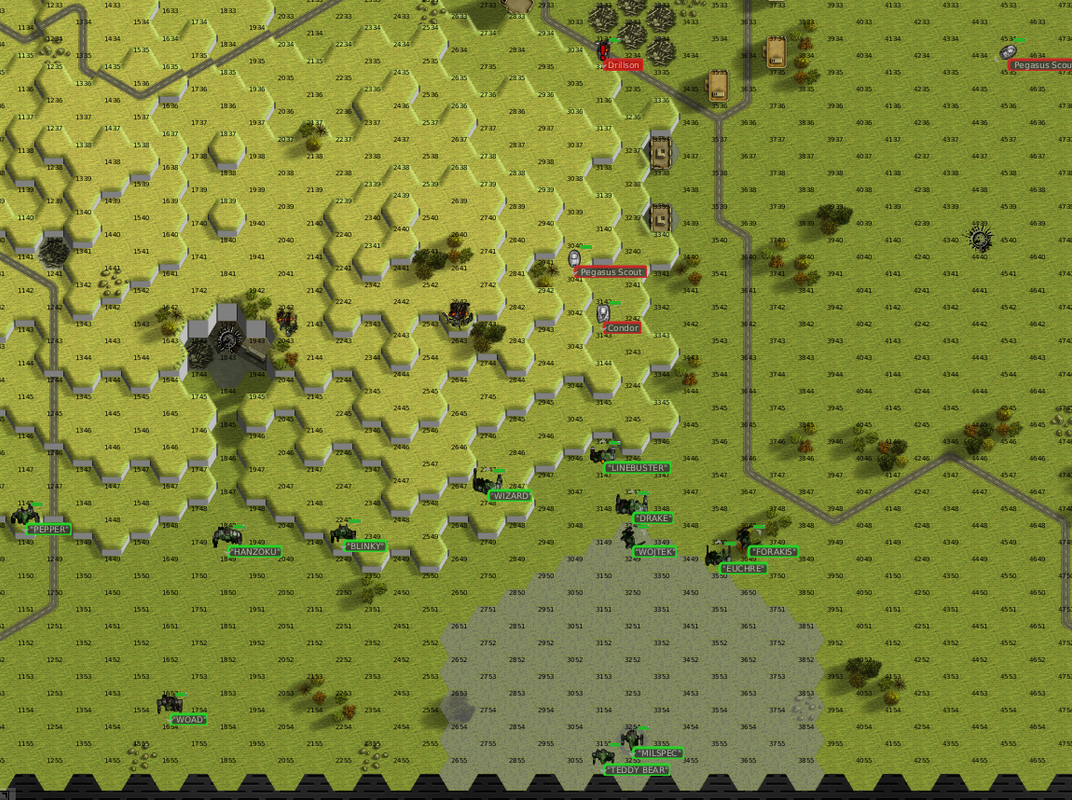
The assault mechsnow including
Hanzoku'sare always slow to retreat. All of them can jump, which is handy for making rearward progress while still presenting a difficult tactical problem to the enemy, in terms of making a safe approach.
Hanzoku reports that he has not yet figured out how to unlock the weapons in his new ride, so he will be making a quick retreat and hoping that our tech teams have the answer.
Linebuster, still firing cluster shot, finds a hole in the nearer
Pegasus tank's armor, and the shrapnel rattling around inside kills its crew. (Did you know that cluster ammo has a chance to roll motive system damage for each pellet? That's pretty sweet, when fighting vehicles.)
Turn 15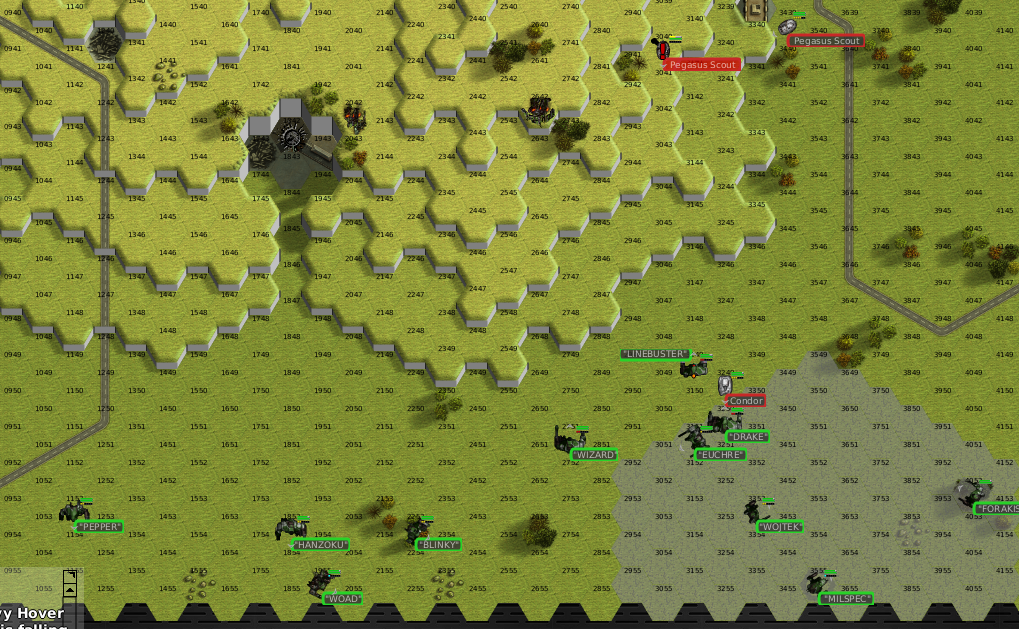
A bold, but fatal, call by the Condor's commander.
Blinky destroys its engine, and
Milspec follows up for the kill.
Linebuster, meanwhile, connects with another cluster shot to another hovertank, and immobilizes that one too. Three rounds, three hover tanks, three mission kills. Solid work.
The hill above the valley entrance rises and falls slightly, as though taking a deep breath. The slope over the entrance shifts, rends, and then flows, pouring tons upon tons of earth over the broken doors.
Turn 16
No free kills on those immobilized tanks, however: the Capellan mechs are coming into range now, and we'll need to discourage them from harrying our retreat.
Turn 17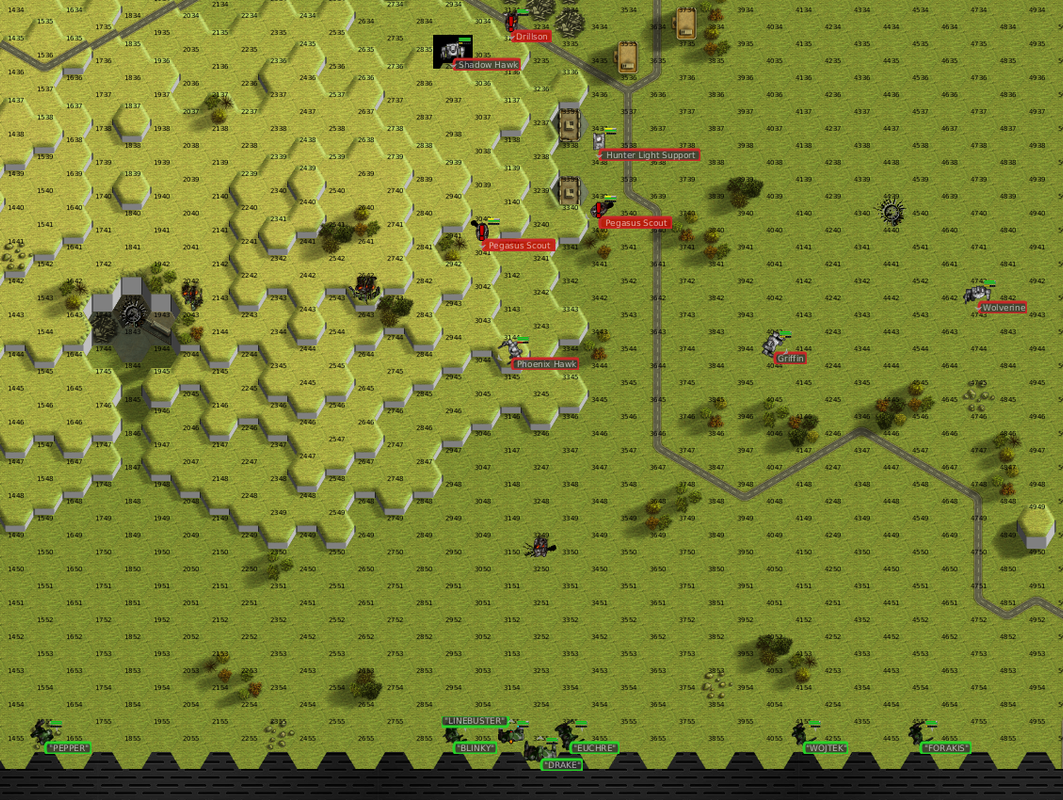
In the parting exchange of fire,
Linebuster shoots the engine out of another mech, after
Drake opened up its armor with a trio of PPC shots. The Bastards escape the field.
Damage, Injuries, Salvage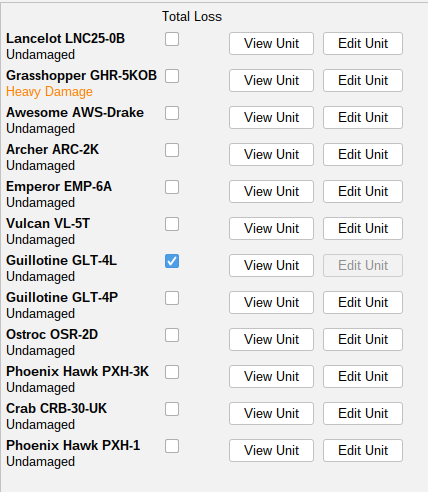
As usual, 'undamaged' isn't actually undamaged. We probably can't patch up both the Crab and the PXH-3K for want of ferro-fibrous armor, and most of the rest of the unit is dinged up.
Woad is mildly concussed from the PPC shot his Grasshopper took to the head, but he's still functional. (Shame we were slightly too dinged up to stick aroundthe 3M Phoenix Hawk we killed would have made for some ferro-fibrous salvage.)
In terms of salvage, we didn't control the field at the end of the battle and can't take anything we killed, but we did pick up a huge kill bonus, about 16 million C-bills, for taking a Capellan assault lance and a few vehicles off the table.
We did, of course, walk off the field with a shiny new (old) Crockett, a Star League-era assault mech mounting a pair of ER Large Lasers, an LB10X autocannon, a pair of SRM-6 launchers, and some small lasers for fun. We'll cover a little more on that in the next mission log.
Kill BoardsWoad joins the ranks of our elite pilots at 2+ gunnery, 3+ piloting, and is now both a Melee Specialist and an ER PPC Specialist. Very different range preferences there.
Last Mission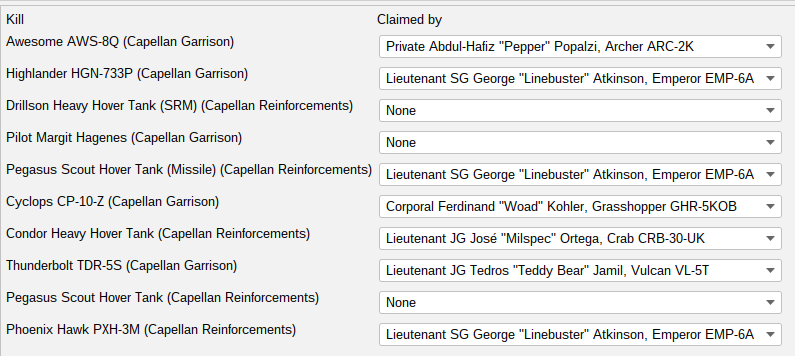 All Time
- "Rook" Ishikawa (31, 10 mechs, 2 Clan kills)
- "Drake" Halit (22, 8 mechs, 2 Clan kills)
- "Woad" Kohler (16, 7 mechs, 1 Clan kill)
- "Linebuster" Atkinson (15, 9 mechs)
- "Carcer" Ngo (14, 6 mechs, 2 Clan kills)
- "Teddy Bear" Jamil (13, 6 mechs, 2 Clan kills)
- "Wizard" Que (8, 6 mechs, 6 Clan kills)
- "Severe" Payne (8, 6 mechs)
- "Hanzoku" Yuksel (8, 5 mechs, 2 Clan kills)
- "Blinky" Stirzacre (7, 1 mech)
- "Ker-Ker" Ec (6, 3 mechs)
- "Euchre" Kojic (6, 2 mechs)
- "Milspec" Ortega (6, 1 mech, 1 Clan kill)
- Simona (6, 1 mech, 1 Clan kill)
- "Double Dog" Dare (5, 2 mechs, 1 Clan kill)
- "Pepper" Popalzi (5, 2 mechs)
- "Faceplan" Farooqi (3, 1 mech)
- "Wojtek" Frajtov (2, 2 mechs)
- Pvt. Erine Forakis (2, 1 mech)
- "Kicks" Hernandez (1, 1 mech, 1 Clan kill)
- Sgt. Philippa Khadjikyriakos (1, 1 mech)
Mission Log ContinuesDay 7 RepairsUse 135 points of standard armor
29 points of ferro-fibrous armor
20 LB10X solid
10 LB10X cluster
210 LRMs
Cargo State 4 tons of leg actuators
23 rounds of LB10X solid shot (2.3t, 10 per ton)
14 rounds of LB10X cluster shot (1.4t, 10 per ton)
635 LRMs (5.29t, 120 per ton)
0 points of ferro-fibrous armor
39 points of standard armor (2.43t, 16 points per ton)
1 ton of rescued Leopard crew
16.42/70 tons capacity
Day 7 NotesSupplies are looking a little bit light, especially for
Milspec and Forakisunless we run across another Capellan running ferro-fibrous armor, whatever damage they take for the next three days is permanent. The Phoenix Hawk is back to full combat readiness, but the Crab is sitting on five points of left arm damage.
No other combat today, so between
Euchre and the dedicated techs, we're able to get all the rest of the mechs fully repaired and rearmed (to the extent we have reloads for them).
There is also the matter of the Crockett. Leaving aside
Drake's reaction to
Hanzoku's escapade (what does he think of it?), the mech itself tells a story. This is the Star League version, with a bunch of until-recently LosTech: double heat sinks, LB10X autocannon, ER large lasers. There aren't a lot of those around. We ran across a couple on Tukayyid, in ComStar's hands, and
Hanzoku remarks that they're not uncommon back in the Clan homeworlds, or presumably as garrison units in the Clan-occupied territory behind the front lines in the Inner Sphere.
The Fifteenth Dracon were, as I believe we mentioned earlier, a Star League unit that stayed in the Inner Sphere instead of following Kerensky, and proudly display that heritage in their insignia and paint scheme. It seems they also have some Star League equipment left, hidden away for a rainy day, like the one we're bringing. Our actions at the supply depot will help keep it out of the fight, at least until they can dig out whatever remains of the stockpile
Hanzoku attempted to blow up. Mechanically, that will reduce enemy quality by 1 additional step.


 Author
Topic: The Opinionated Bastards: a BattleTech/MekHQ Mercenary Campaign (Dec. 30, 3053) (Read 86519 times)
Author
Topic: The Opinionated Bastards: a BattleTech/MekHQ Mercenary Campaign (Dec. 30, 3053) (Read 86519 times)